Many online tools help us optimize SVG files before getting the code into our projects. But what if I tell you that the way we draw every element has an impact on the exported code? Understanding the code generated from graphic software will help us gain more control over it. Here are some tricks that can save us time when manipulating SVG code on our projects.
Although the examples are on Illustrator, I will also cover ways to improve the code from SVGOMG, and I hope most of them apply to any software you are using to create graphics that will become part of a web or app later on. Some of these tips may sound too picky, but if you are in a project where every bit counts, they might serve you well.
1. Start small
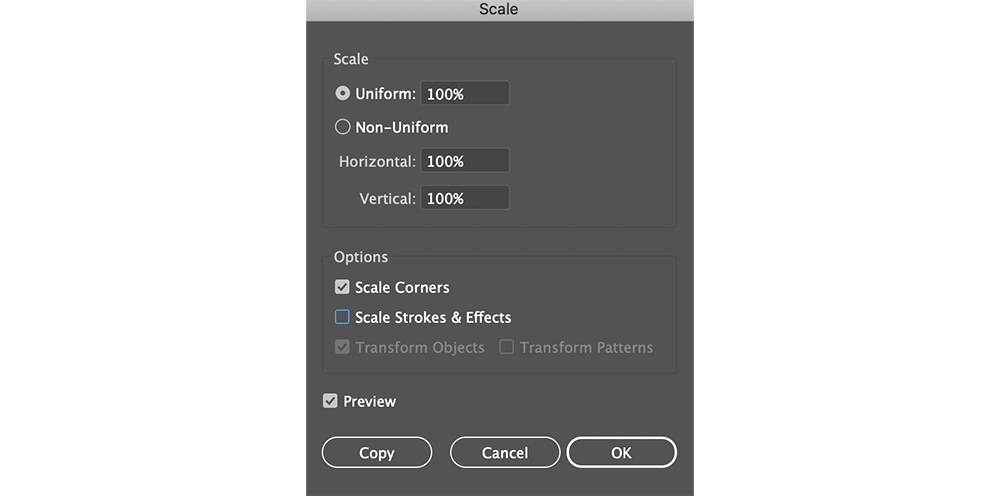
A tiny thing we can do is to design small. As the name implies, SVG scales infinitely without losing quality, which is one of its main advantages. Sometimes we forget about the canvas size while creating, and sometimes we design on big screens with things that need to be at scale. Before exporting, I found it helpful to scale the design and minimize it to a reasonable size. This way, we will reduce many numbers on coordinates that use more than 1 or 2 digits. Of course, the bigger the file, the bigger the impact.
2. Avoid "magic" numbers
Following the previous point, after moving our design around, scaling and collapsing, we might end with many decimal numbers when exporting the results (especially on the stroke attribute). In case it applies, there is a checkbox option that can be used to prevent our stroke and effects to scale with the shape.
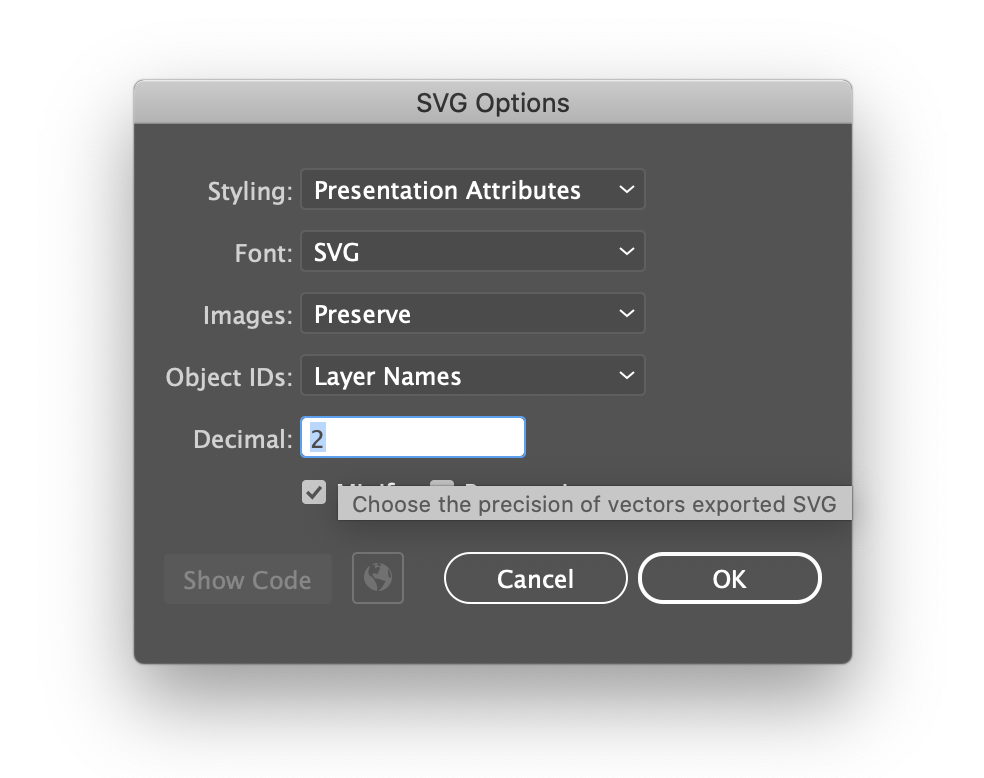
- In Illustrator, it is possible to choose how many decimals from 0 to 5 the vectors will have after choosing the 'Export As' option:
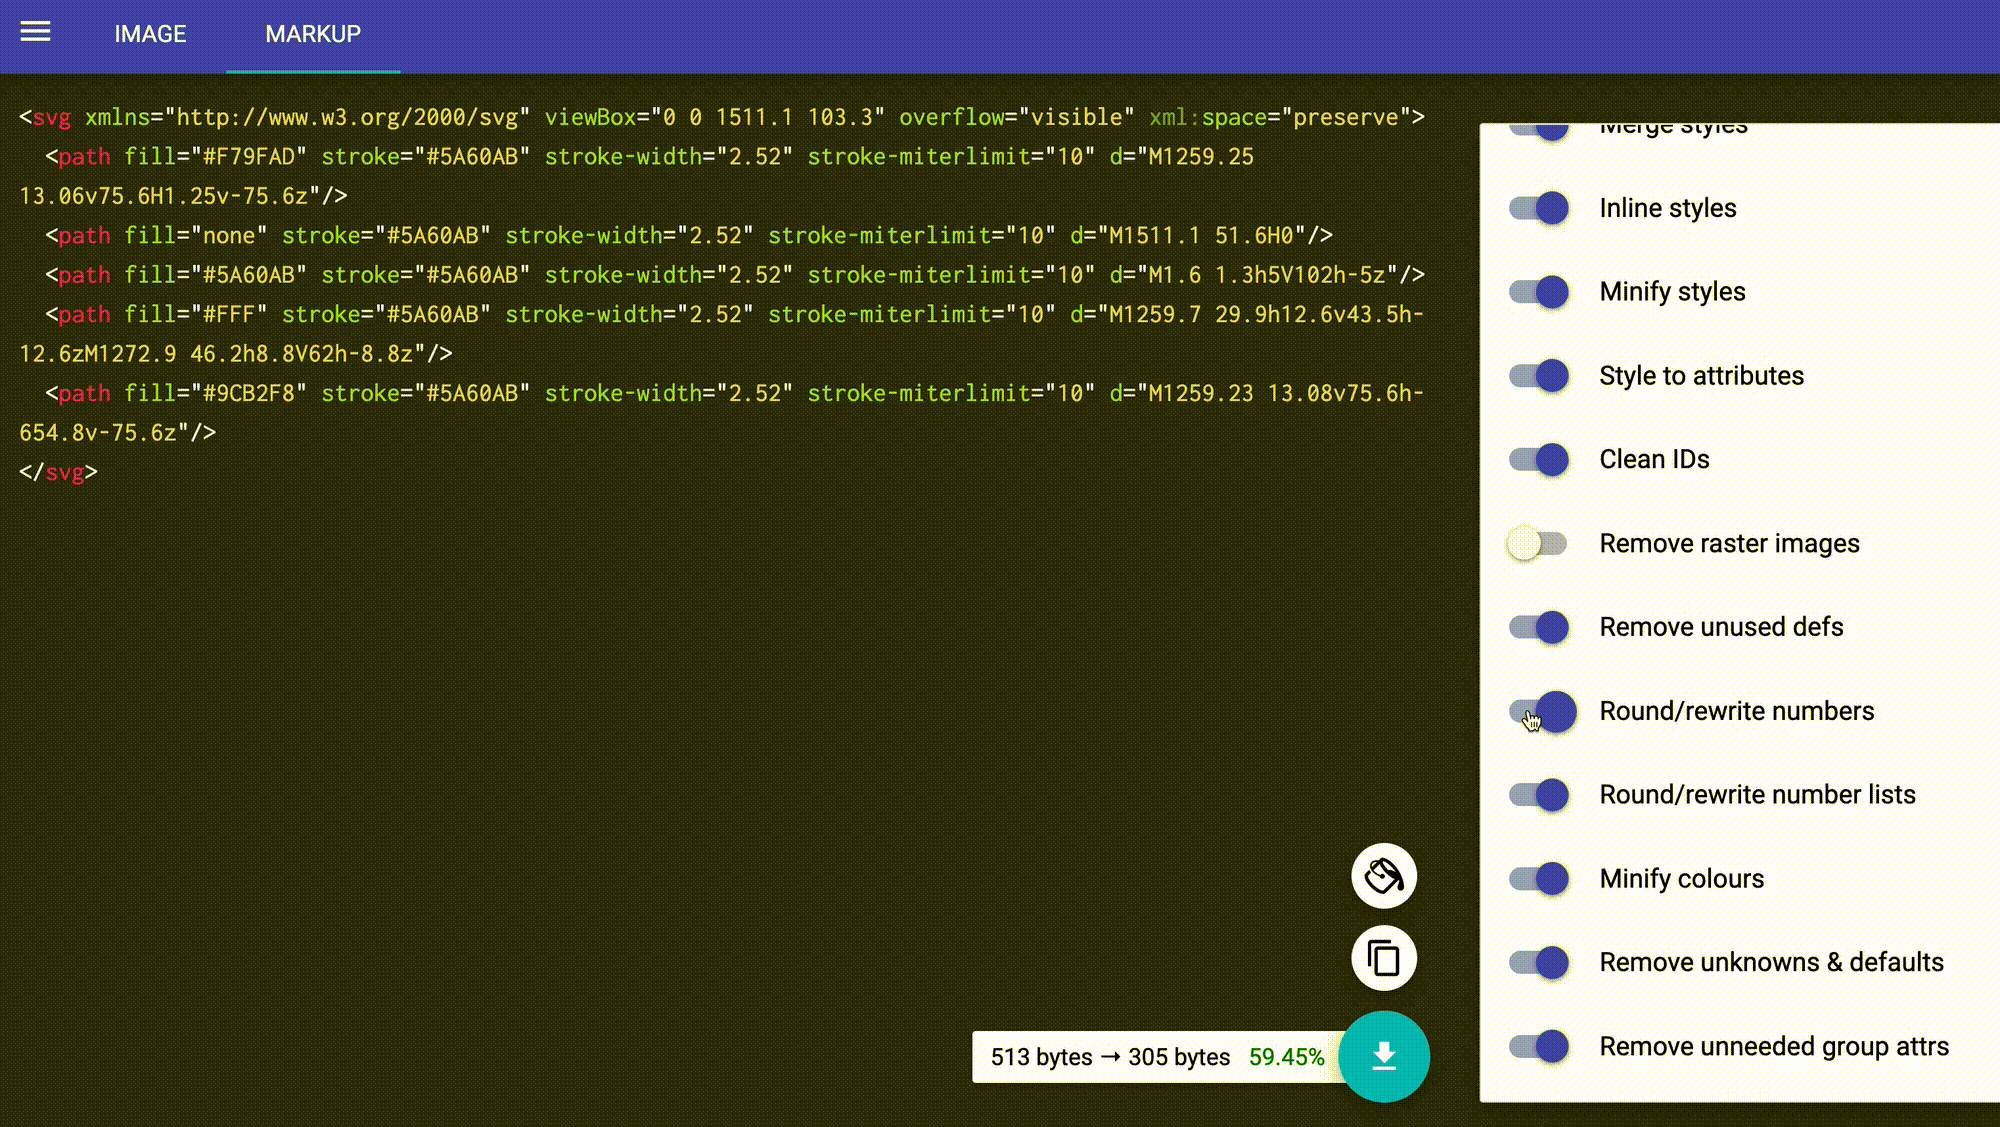
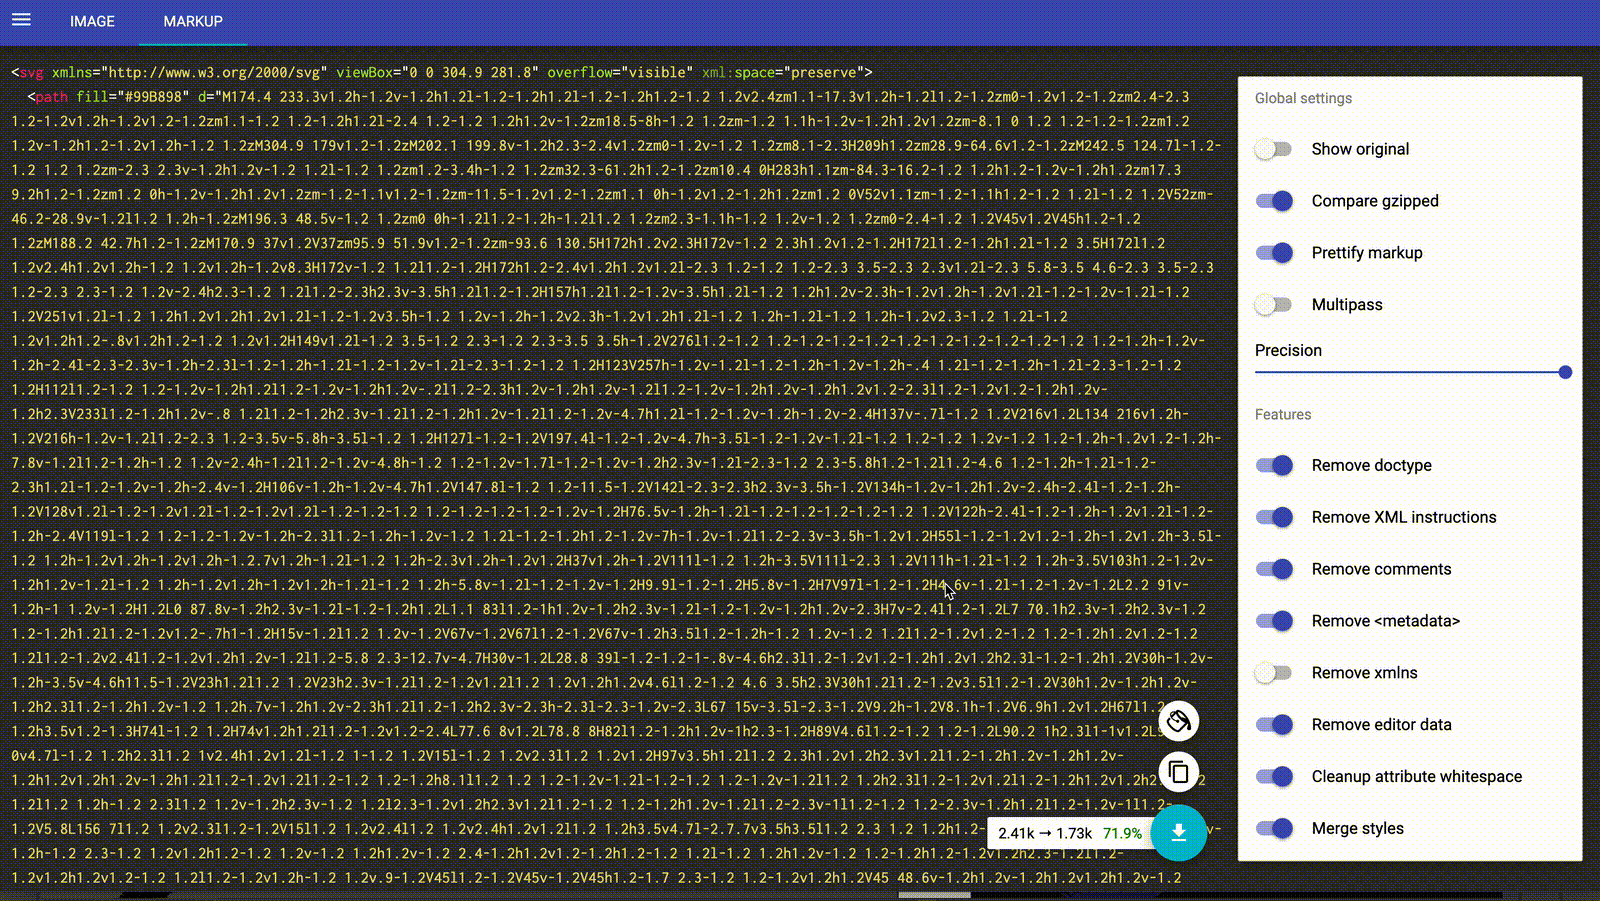
- In SVGOMG, there is an option that I like: 'Round/rewrite numbers'. Take a look at the
stroke-widthin the example below. In the end, I am editing the Precision to reduce one more decimal to the stroke; let's review this option further in the next one.
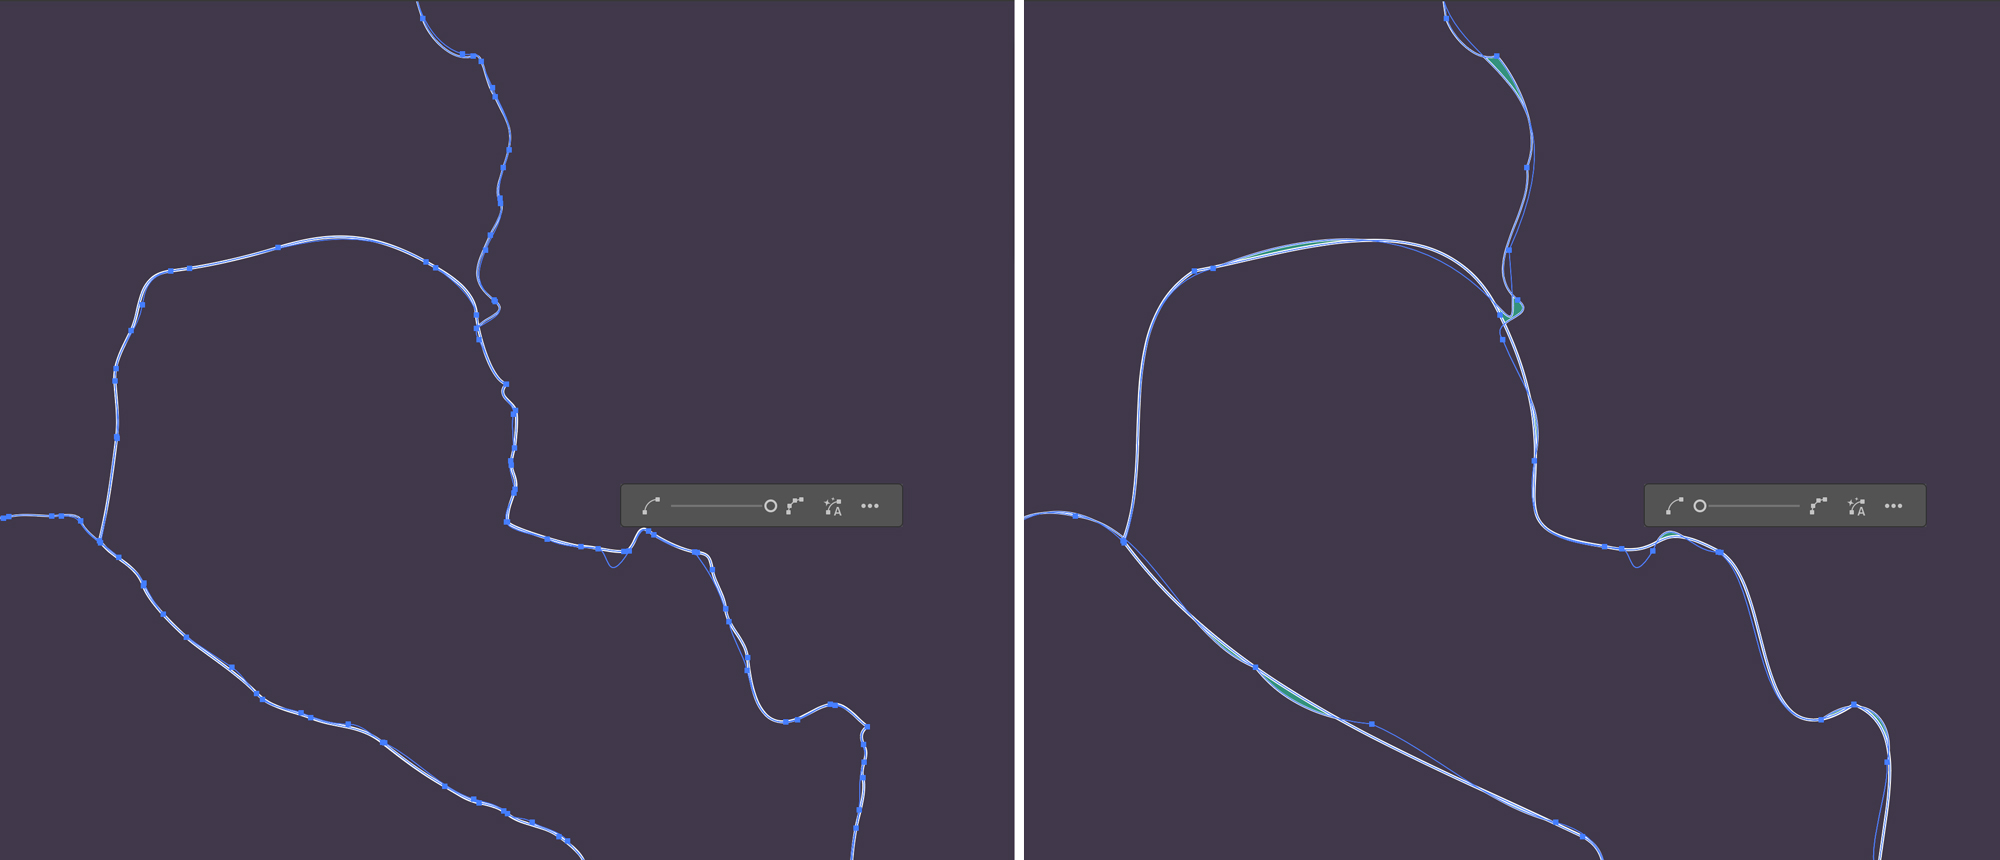
3. Simplify paths
Every point counts. When reducing the nodes of our illustration, we are reducing the file size by generating less SVG code. These are two different ways of doing this:
- In Illustrator, we select the path we want to edit, then in the menu, click 'Object > Path > Simplify'

- In SVGOMG, after pasting the code, a sidebar will appear on the right with a slider under the name "Precision" to play with how many nodes we want to keep while observing the changes on the graphic
Sometimes we won't even notice the difference. Other times this is not an option: unfortunately, I didn't find a way to reduce nodes in a way that keeps a perfect fit like, for example, in a political map where we need the limits to match perfectly.
4. Extra letter-spacing in SVG text
When using text in SVG, the code exported includes tons of <tspan> with letter-spacing between the letters. Which is very annoying when we want to edit those texts in the code. I used to remove those by hand. That is until I found that the default setting for kerning between characters is 'Auto' (which is the Illustrator solution to adjust visually some pair of letters), and to revert it back to its original spacing, we need to select '0'. This will avoid those extra tspans with letter spacing and simplify our code a lot.
- With kerning Auto:
<text font-family="Arial"><tspan letter-spacing="-.01em">L</tspan><tspan x="5.5" y="0">o</tspan><tspan x="12.08" y="0" letter-spacing="-.01em">r</tspan><tspan x="15.89" y="0">em ipsum</tspan></text>
- With Kerning 0:
<text font-family="Arial">Lorem ipsum</text>
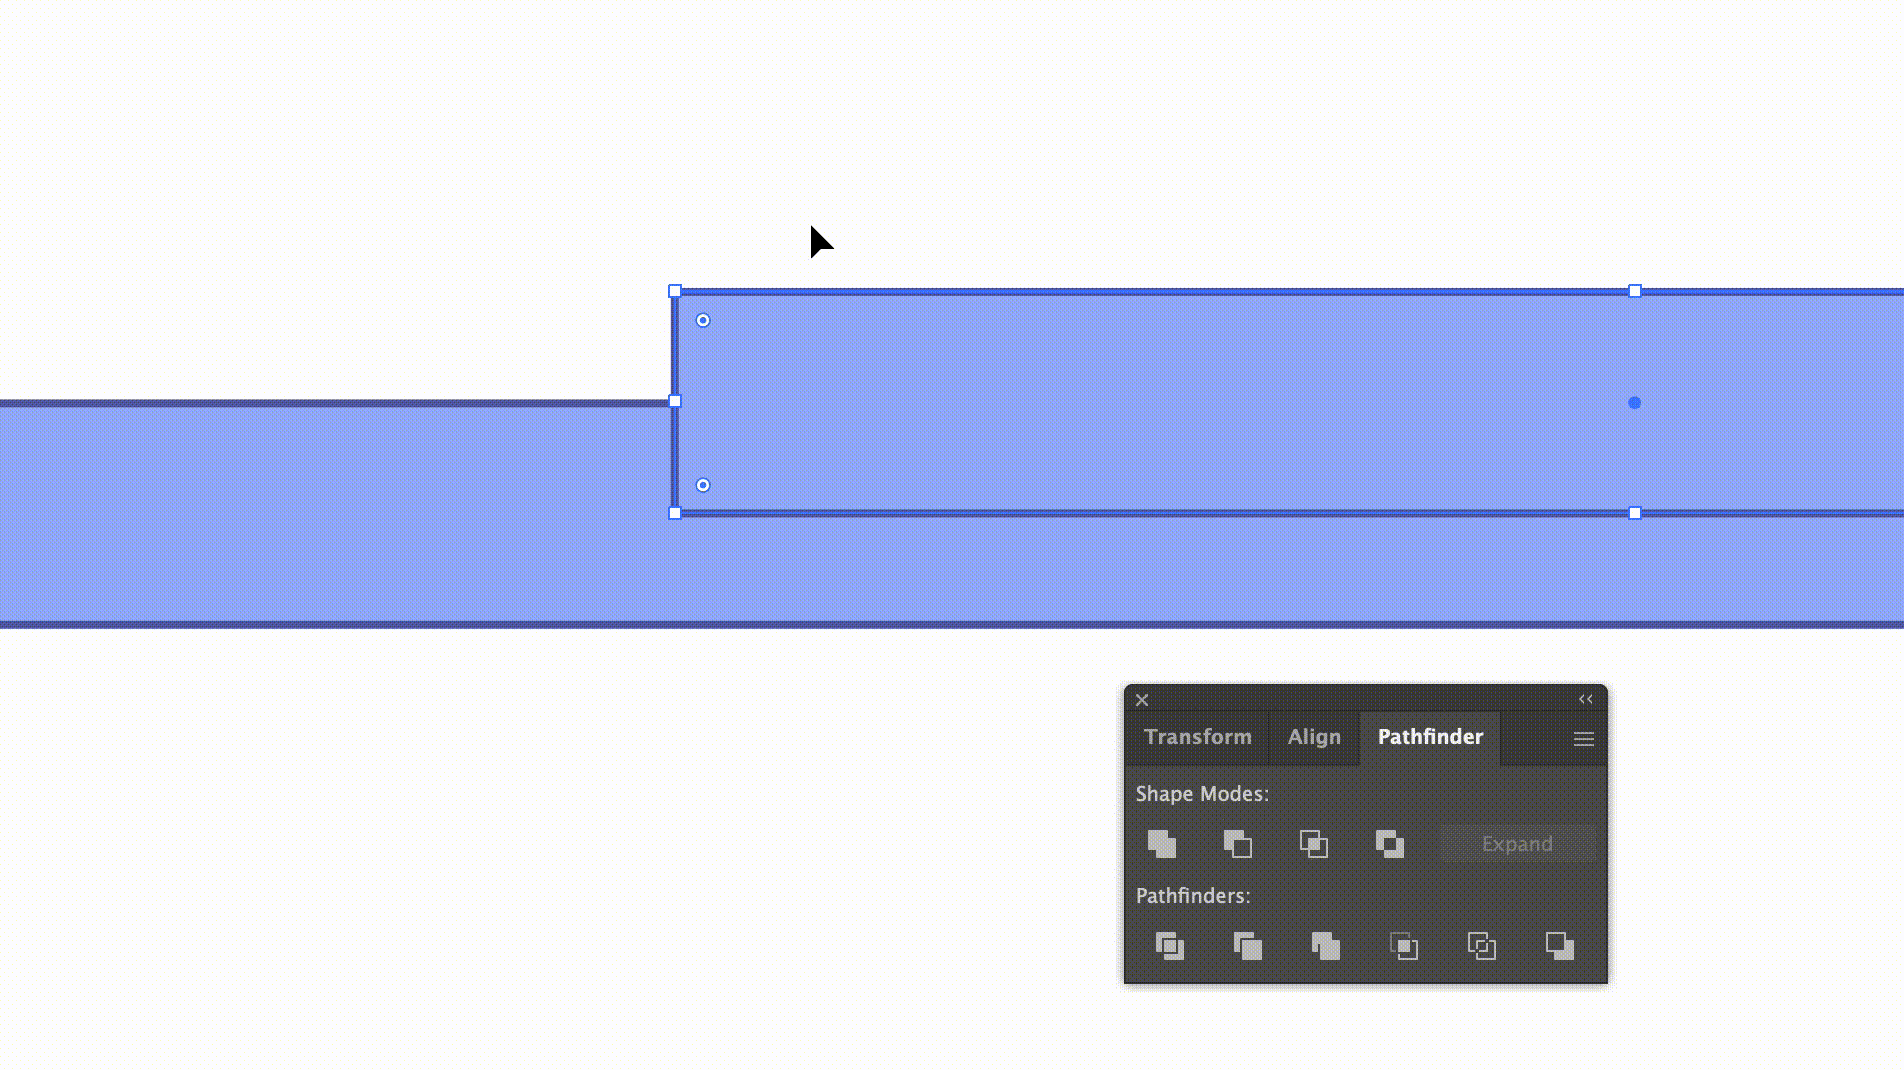
5. Merge/expand shapes
Let's say we have many shapes on top of each other, creating a complex figure: as we export this drawing, every shape will have its code, and all the shapes will remain there. A good amount of code will be reduced if we merge the shapes that share the same attributes to make them a single shape. To do that in Illustrator with the figures selected, we go to the Pathfinder panel and click the first option 'Unite'.
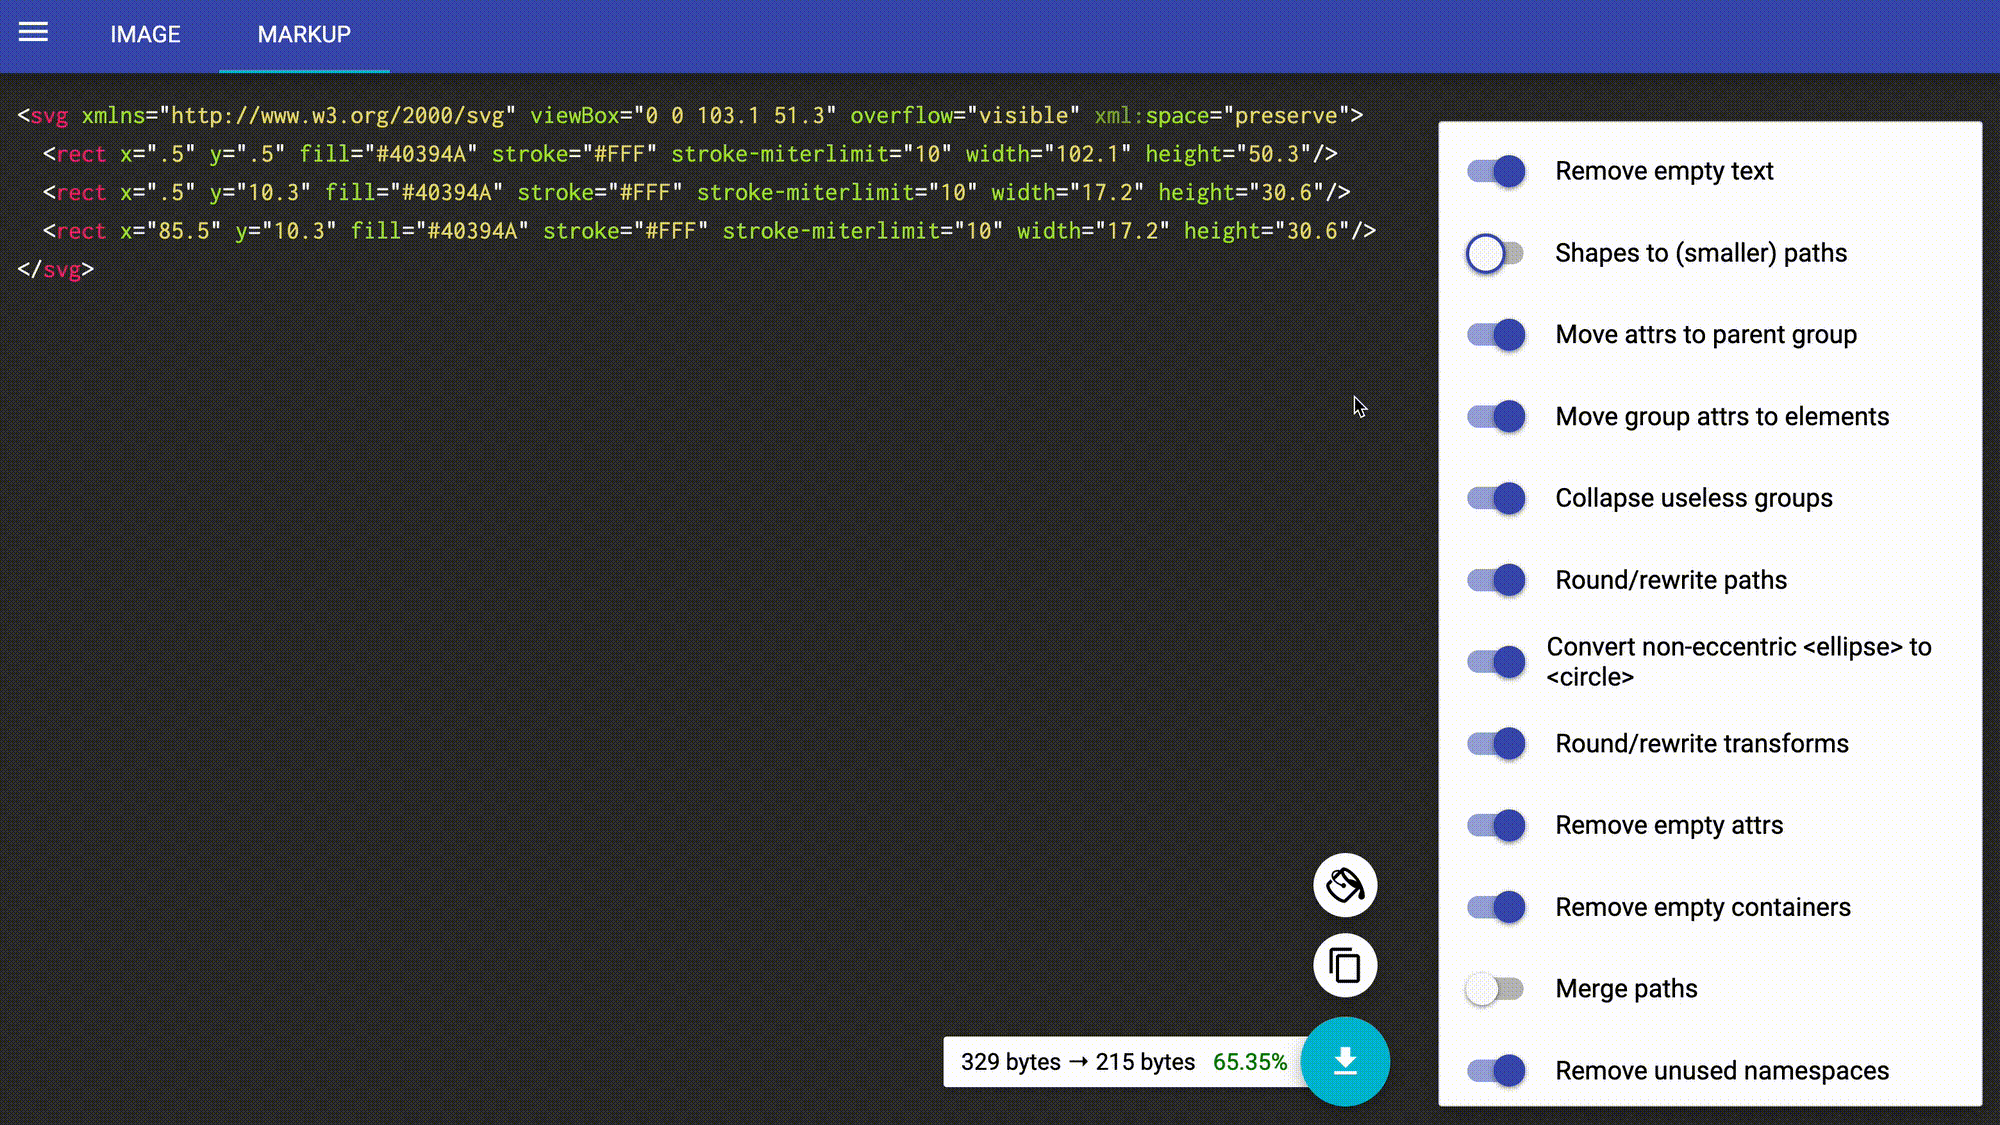
If some of those shapes are paths and they are on top of each other, we have the option 'Merge paths' on SVGOMG that will collapse those paths into one. For basic shapes, we'll need to check the option 'Shapes to (smaller) path'. But this is not something that works as I expected, as I can't seem to make all shapes merge, and I wonder if it has to be with the position of the elements:
6. Radius on rects
When we add corners to a <rect>, Illustrator turns the <rect> into a <path>. Even if the radius is big enough to turn the square into a circle, it will always return a path in the code. But there are many cases where we want to keep the basic shapes as they are. In the case of the circle, the only solution will be to draw it with the ellipse tool, but in any other case, we can use the rectangle tool, and instead of rounding the corners in Illustrator we can add the attributes rx and/or ry to the code later. That will also save us some bytes.
- In Illustrator, with rounded corners:
<path d="M60 100H40C17.9 100 0 82.1 0 60V40C0 17.9 17.9 0 40 0h20c22.1 0 40 17.9 40 40v20c0 22.1-17.9 40-40 40z"/>
- In the code, rounded corners with
rx:
<rect width="100" height="100" rx="40"/>
7. Rotation of rects
How we draw on Illustrator determines many things. If I'm drawing a rect 10 units width and 50 units tall, and then I decide to rotate it 90 degrees, the shape will be exported with a transform rotation inside and with the attributes swapped:
<rect width="10" height="50" transform="rotate(90 25 5)"/>
The first number in the transform represents the angle (90 because I rotated it clockwise) but should be -90 if I'd made it anticlockwise. The other two numbers set the coordinates of the transform-origin to the middle of the rectangle.
The only way I found to reset this is by changing the transforms and width/height in Illustrator, which is better than doing it directly in the code, where the x and y positions might have changed too.
This doesn't happen with one or few rects only, but on the rects that belong to a composition that is rotated later in the process.
8. Direction of shapes
Let's say that I kept the transform rotation transform="rotate(90 25 5)" from the example above. Every time I change the width of the bar, it will grow from right to left; as I was building a bar chart, I needed them to grow the opposite way. Here are some options to change this:
- In Illustrator, rotate the shape in a different direction (anticlockwise)
- In the code, change the rotation from 90 to -90
- In Illustrator, reverse the path direction Object > Path > Reverse path direction
Bonus track
- The
<use>element is something to keep in mind for cases where a part of the graphic is repeated; here is an article with an example of how this element can save us many lines of code. - The attribute
stroke-miterlimit="10"by default appears many times in exported paths from Illustrator where thestroke-linejoinis round and is not doing anything. Here is a complete article about this attribute. - Many other articles go further on SVG code optimization, like this one by Bence Szabó that dives deeply into manual optimization of a pattern while learning many things about SVG syntax.
I feel there are so many tips and tricks to explore. Do you have any to share?